Introduction: Cypress is one of the most popular and modern automation tools for end-to-end and functional testing. It is widely used for web application testing due to its fast execution, real-time reloading, and powerful debugging capabilities.
You can easily install Cypress using development environments like Visual Studio Code or WebStorm. Compared to other automation tools, Cypress offers several advantages such as built-in test reports, automatic waits, detailed debugging logs, and rapid test execution.
Step1: Install Node.JS
Cypress runs on Node.js, so installing Node.js is a necessary first step before setting up Cypress. To ensure compatibility with the latest versions of Cypress, make sure you have Node.js version 14 or higher installed on your system.
You can download the latest stable version of Node.js from the official website:
👉 https://nodejs.org/en
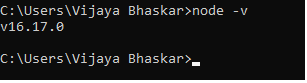
Once the installation is complete, verify that Node.js is installed correctly by running the following command in your Command Prompt or terminal:
Step2: Install Visual Studio Code:
Visual Studio Code (VS Code) is a powerful and lightweight Integrated Development Environment (IDE) that provides excellent support for JavaScript and test automation frameworks like Cypress. It helps you write, debug, and manage your test scripts efficiently with features such as intelligent code completion, syntax highlighting, and integrated terminal support.
You can download and install Visual Studio Code from the official website:
👉 https://code.visualstudio.com/
Step3: Create a New Project in Visual Studio Code and install Cypress
3.1 Create Cypress Project:
To begin setting up your Cypress project, follow these simple steps in Visual Studio Code (VS Code):
- Create a New Folder – Create a dedicated folder on your system where you want to store your Cypress project files.
(Example:C:\Projects\CypressDemo) - Open the Folder in VS Code –
Launch Visual Studio Code and navigate to
File → Open Folder…
Then, select the folder you just created to load it into your workspace. - Open the Integrated Terminal –
In VS Code, open the built-in terminal by going to
View → Terminal
or by using the shortcut Ctrl + ` (backtick key).
This terminal will be used to run all Cypress installation and execution commands.
3.2 Initializing npm (Node Package Manager) for Cypress Project:
Before installing Cypress, you need to initialize npm (Node Package Manager) to manage project dependencies.
- Open the terminal in Visual Studio Code.
- Run the following command:
npm init -yThe-yflag automatically accepts the default configuration values, so you don’t need to enter details manually.
This command creates a package.json file in your project folder. The package.json file stores important information about your project such as its name, version, scripts, and dependencies.
A sample package.json structure looks like this:

3.3 Installing Cypress via npm:
To install the latest version of Cypress in your project, use npm (Node Package Manager) from the terminal in Visual Studio Code:
npm install cypress --save-dev
Explanation:
npm install cypress→ Downloads and installs Cypress in your project.--save-dev→ Adds Cypress as a development dependency in yourpackage.json, ensuring it’s only used for testing and not included in production builds.
Once the installation is complete, you will see a node_modules folder in your project and package.json will include Cypress under devDependencies.
Step4 – Open Cypress for the First Time:
After successfully installing Cypress, you can launch it and set up your project for testing:
- Open the terminal in Visual Studio Code.
- Run the following command:
npx cypress open
What This Does:
npxensures that Cypress runs directly from your localnode_moduleswithout requiring a global installation.- The Cypress Test Runner will open, allowing you to choose the testing type, such as End-to-End (E2E) testing or Component testing.
- It will also guide you through the initial configuration for your project.
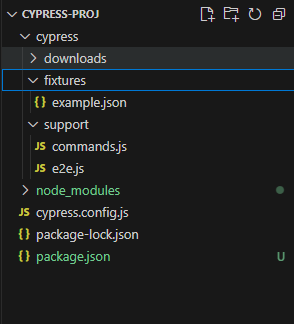
Automatic Folder Structure Creation:
When you open Cypress for the first time, it automatically creates the following project structure:
Watch the YouTube video here: How to install cypress in visual studio code